
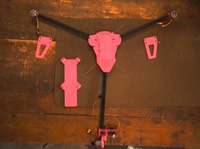
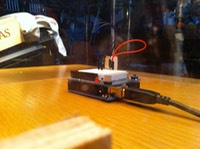
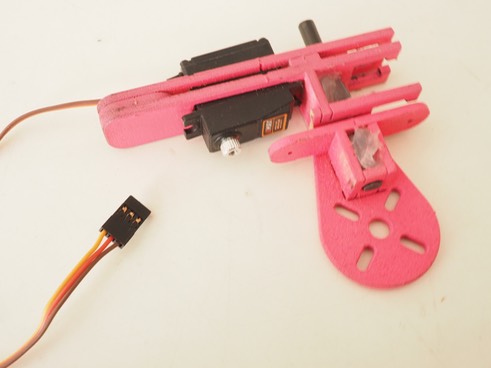
(The tricopter mid-build)
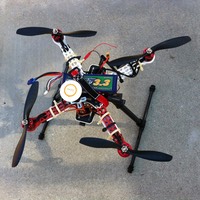
What does a 13-year-old nerd do during summer vacation? Well, I decided to build my first tricopter, after being inspired by a Make: Magazine article. I had previously assembled a DJI 330 Flamewheel (a quadcopter), but I wanted to try a Tri because they are better for photography. I decided to follow Lucas Weakley’s (Make’s) Maker Hangar 2 tricopter build. Lucas sells a kit with the frame and the nuts and bolts, but I decided to source and make all of the materials myself. This essentially led to three major stages in the building process.
STEP 1: Acquiring Materials
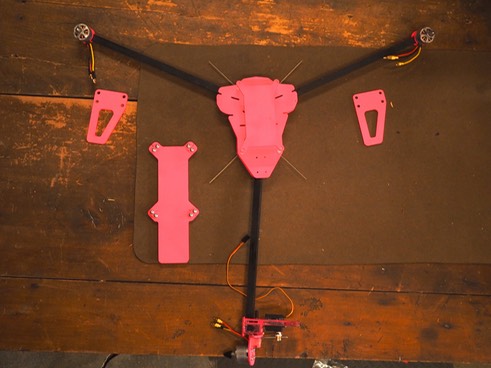
One of the major parts of building the tricopter from scratch was making the frame. The frame consisted of the lasercut parts and the arms.
By studying the plans, specifically the tail assembly components, I determined that 1/8” plywood would work well for the laser-cut parts. If you live outside the US, 3mm would also work.
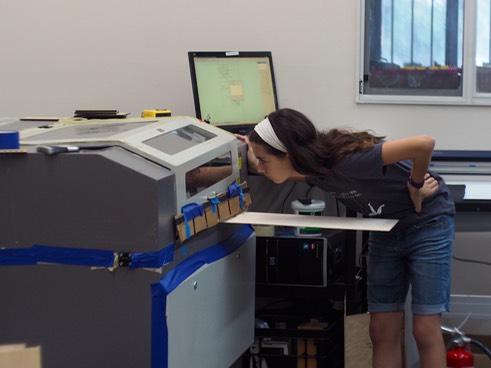
I went to my hackerspace, Null Space Labs, to laser-cut the plywood with the Dropbox files that Lucas provided. The first time I went, I made an error in my calibration and the laser unevenly cut the plywood. I attempted to Dremel out the pieces (note to self: don’t do that again.) In the end, I just bought more plywood and recut the pieces.

Next were the arms. Lucas designed the kit using oak arms that were 7/16” x 7/16” x 12”. I was unable to find these online or in stores (like, I could literally find these nowhere except for Lucas’ online store) so instead my dad and I bought a 1/2”x2”x48” piece of oak from Lowes instead and ripped it down (cut it down) on the table saw. We then chopped it to 1’ long segments on the mitre saw.
Next, I traveled all around finding the screws, bolts (I couldn’t find the 22mm bolts, so I bought 4 extra 25mm bolts, which worked fine), nuts, Dubro EZ connectors, Dubro push rods, bullet connectors, the 14 guage wire, the nylon bolts and nuts (I bought the standoffs online), and carbon rods/tubes. I also bought all of the remaining parts online.
For the complete part list with links to where you can buy the parts online click here…
A quick note: this parts list is made up of every single part, each part able to be bought online. Some of these links will connect to sites selling bulk items,, which is why I bought many of my parts at local hobby stores. In addition, this list includes parts such as batteries and battery chargers that I already had. So, the final price might differ from what the actual cost is.
As a side note, it turns out that Lucas’s kit is a pretty good deal. However, I wanted to stay with my goal of building the kit from scratch.
STEP 2: Assembly
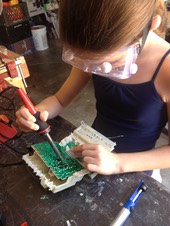
Next, I started assembling the parts I had acquired.
For assembly, I followed Make:/Weakley’s 2nd, 3rd, and 4th videos in the series.
All of the steps to making the tricopter are outlined in Lucas’ videos, but here are some tips and notes that I will highlight.
First, I assembled and glued the tail assembly and spray-painted the frame pieces; I painted the arms black and the body hot pink.

-For the carbon tube’s OD (outer diameter), I used 7/32”. For the specific one I bought, there was a tube made by the same manufacturer that fit inside this tube. That rod’s OD happened to be 1/8”.
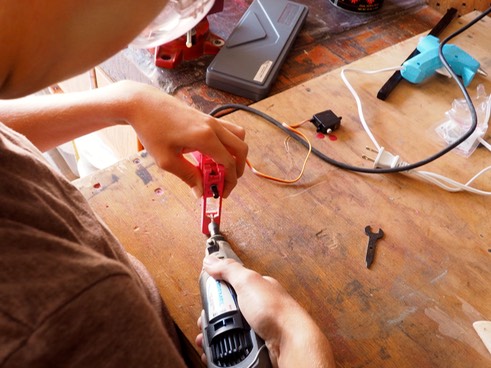
-When I was inserting the servo, I had a bit of trouble because the servo’s wire was making it very difficult to put the servo in. So, I cut a notch with a Dremel in the bottom of the hole in the tail assembly so that the wire could slide through.
-This was pretty much a personal thing, but when I was ripping the arms, I was off by about 1/32”. The arm wouldn’t even come close to inserting in the tail assembly. So, if you rip the arms yourself, make sure they are exactly or reeaalllllly close to 7/16”. Alternately, you could try and find square dowels with the correct dimensions or buy them from Lucas.
-I was a little bit too generous with my wiring so that the battery clip stuck waaayyyyy out, so I ended up pushing it further into the space between the two plates, though it still pops out sometimes. Don’t make my mistake and don’t be afraid to cut the wire. You can be wrong and add, but it is really annoying if you leave too much.
STEP 3: Troubleshooting and Upkeep
Now, I would like to say that once I screwed in that final nylon bolt and unplugged my flight controller that I flew off perfectly, but unfortunately, that didn’t really happen.
Eventually though, I did get the hang of it.
Originally, my issue was that my yaw gyro was reversed. I went into the software and flipped it so that yaw went in the opposite direction that the tricopter was spinning, but when I yawed to the right, the servo spun to the left, which was reversed. So, I also flipped the yaw (rudder) in my transmitter (DX6) and it worked fine.
My second issue was that the board wouldn’t arm, which happened sort of randomly because I had had some successful flights before it stopped arming easily. I tried all of the stick positions that I knew, and that didn’t work. What did end up working though, was recalibrating the sticks on my transmitter. What happened was that the throttle/rudder stick wasn’t recognizing the stick at the lowest position. It thought 0 throttle was at 1mm above the physical 0 position. So, I found a video from ‘Painless360’ and learned how to recalibrate my sticks. I was then able to arm the board.
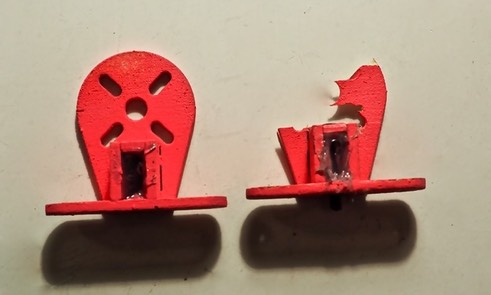
An ongoing issue I have battled with is that the tricopter motor mount on the tail assembly snaps after a crash or prolonged usage. I had lasercut 2 of these but after the second broke I 3D-printed an add-on that seemed to work better.
Currently (and unfortunately), my motor started glitching (stopping and starting, like stuttering.) I had this problem before and the solution was just to replace the motor, but after a few moments of this stuttering my ESC burnt out with a puff of smoke. So, I am currently not flying. Note to self: next time something doesn’t work, stop, figure out what is going wrong, fix it, and then fly, so as not to short and break a quarter of the electronics on your drone. [ :’( ]
STEP 4: Reflections
Over all, I would rate this kit/project with a 5 out of 5 Very Happy Robots because

the instructions were super clear and the kit was decently easy to put together. The only negative was that some of the parts were difficult to find. I did not penalize the rating because I had chosen to find all of the parts myself.
